 It is made of waxed canvas and unrolls into a double pannier set.
Brooks bags (and saddles) are really great too. Clearly out of my price range though.

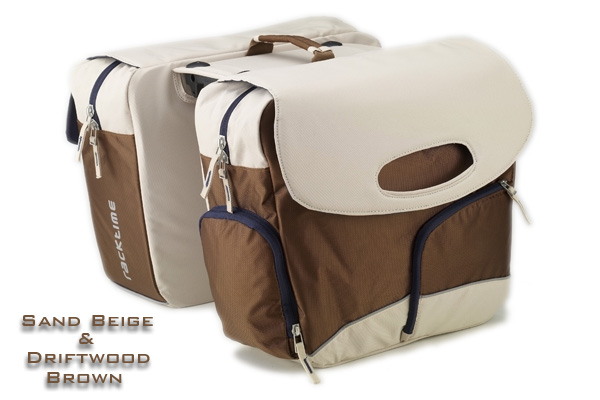
I also like this set, by Racktime.
 I looked at a couple local bike shops, but the selection was limited. So, as I tried to decide/justify spending a bunch of cash on a really stylee bag, the idea of making some popped into my mind. Of course, the internet has lots and lots of tutorials, ideas and instructions on how to make a variety of panniers, messenger bags, baskets, and more.
I decided on loosely following these instructions, and got down to business.
My man found a pair of rubberized surplus bags at Princess Auto for $2 a piece; a good shape for panniers, but no functional system for attaching them to a bike. I bought 4 small hangers and enough screws and acorn caps to attach the hangars to the bag (I used #8, 1/2 inch stainless steel), acorn caps are key if you don't want the screw tips scratching you every time you reach into your bag. You could use heavy duty mirror hangers, but my rack has large tubing so I went with the larger hangers. The original tutorial suggest using plywood as an anchor, but I decided to use an old LP I grabbed at the thrift store instead (Happy South America!). It is lighter, so I'll have to wait and see how it holds up.

Supplies: Hardware $24, Bags $4, LP $1 = $29 for 2 panniers

I scored the record and broke it in half, then measured where to put to hooks and drilled the holes. I also sanded the edges of the record, Before drilling, DOUBLE CHECK where the pannier will sit on your rack to ensure your leg won't hit it while pedaling. I used the drill to puncture the material of the bag as well. If you are using a synthetic material, like, nylon, you will need to melt the edges to prevent fraying. Since my bags are rubberized, it wasn't necessary.

Once all the holes are drilled, line everything up and screw the pieces together - this is what the inside of the bag looks like.

And the outside.

Attaches to the rack, like so.

And here they are, all finished. I took my new panniers for a ride around the block and they seemed to stay in place just fine.I may attach a piece of bungee to prevent them from flopping out sideways in wind/traffic, and will also add some sort of shoulder strap for carrying - I am thinking canvas or woven nylon, just need to find the right material. They are not quite as fancy as the Brooks or Linus gear mentioned previously, but I think they're pretty cool.
So there you go, you can apply this treatment to any kind of bag to convert it to a pannier. Here are the detailed instructions again.
I like the price and the idea however I doubt that those big hooks up top would stay in place after bouncing down a cobble stoned street or hitting a big pothole. Have you found them to be functional and durrable? I like your style more then the Brooks and Linus options
ReplyDelete